
-
Email:zhao@hyliec.cn
-
Tel:+86 311 85273988
-
WhatsAPP:8613931128750
-
 Afrikaans
 -
 Albanian
 -
 Amharic
 -
 Arabic
 -
 Armenian
 -
 Azerbaijani
 -
 Basque
 -
 Belarusian
 -
 Bengali
 -
 Bosnian
 -
 Bulgarian
 -
 Catalan
 -
 Cebuano
 -
 Corsican
 -
 Croatian
 -
 Czech
Czech -
 Danish
 -
 Dutch
Dutch -
 English
 -
 Esperanto
 -
 Estonian
 -
 Finnish
 -
 French
 -
 Frisian
 -
 Galician
 -
 Georgian
 -
 German
 -
 Greek
Greek -
 Gujarati
 -
 Haitian Creole
 -
 hausa
hausa -
 hawaiian
 -
 Hebrew
 -
 Hindi
Hindi -
 Miao
Miao -
 Hungarian
 -
 Icelandic
 -
 igbo
igbo -
 Indonesian
 -
 irish
irish -
 Italian
 -
 Japanese
 -
 Javanese
 -
 Kannada
 -
 kazakh
 -
 Khmer
Khmer -
 Rwandese
 -
 Korean
 -
 Kurdish
 -
 Kyrgyz
 -
 Lao
Lao -
 Latin
Latin -
 Latvian
 -
 Lithuanian
 -
 Luxembourgish
 -
 Macedonian
 -
 Malgashi
 -
 Malay
Malay -
 Malayalam
 -
 Maltese
 -
 Maori
Maori -
 Marathi
 -
 Mongolian
 -
 Myanmar
 -
 Nepali
 -
 Norwegian
 -
 Norwegian
 -
 Occitan
 -
 Pashto
 -
 Persian
 -
 Polish
 -
 Portuguese
 -
 Punjabi
 -
 Romanian
 -
 Russian
 -
 Samoan
 -
 Scottish Gaelic
 -
 Serbian
 -
 Sesotho
 -
 Shona
Shona -
 Sindhi
 -
 Sinhala
 -
 Slovak
 -
 Slovenian
 -
 Somali
 -
 Spanish
 -
 Sundanese
 -
 Swahili
 -
 Swedish
 -
 Tagalog
 -
 Tajik
Tajik -
 Tamil
Tamil -
 Tatar
Tatar -
 Telugu
 -
 Thai
Thai -
 Turkish
 -
 Turkmen
 -
 Ukrainian
 -
 Urdu
Urdu -
 Uighur
 -
 Uzbek
Uzbek -
 Vietnamese
 -
 Welsh
Welsh -
 Bantu
Bantu -
 Yiddish
 -
 Yoruba
 -
 Zulu
Zulu
Your Location:
فبراير . 16, 2025 01:17
Back to list
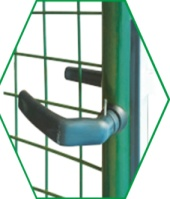
T Posts/L Posts/U Posts
When tackling the task of repairing a fence post, especially for the first time, an understanding of both the practical skills and the materials involved is essential. This not only ensures the longevity of your repair but enhances the overall integrity of your fence structure. Factors like soil conditions, the type of wood, and the existing design play vital roles in determining the success of your repair. Here is a comprehensive guide based on extensive field expertise in fence maintenance and repair.
Pour in fast-setting concrete, which offers the dual benefits of easy workability and quick curing time, critical for jobs necessitating minimal downtime. Ensure the mix is sufficiently fluid to flow around the gravel and thoroughly encapsulate the post base. Water should be added as per the manufacturer’s instructions, typically in an amount that slightly oversaturates, promoting a slow but complete setting process. As the concrete sets, regularly check the level to make any necessary adjustments, maintaining perfect alignment. Curing times may vary, so observe local weather conditions which can influence drying speed. Allow at least 24 to 48 hours for curing before stressing the post with additional strain, such as reattaching fence panels or applying gates. For ongoing protection against environmental stressors, consider applying a sealant specific to wood fencing. Such products mitigate water absorption and UV damage, extending the life expectancy of the post and fence as a whole. Regular inspection and maintenance can prevent the need for frequent repairs. Adjust sprinklers to avoid constant moisture exposure, and keep vegetation away to reduce insect activity. This preventative care will add years to the integrity of the entire fence system. Leveraging these practical steps not only ensures the repair is effective and durable but underscores the importance of quality craftsmanship and material selection. Adhering to these guidelines asserts authority in executing a reliable fence post repair, exemplifying trust through consistent and expert methodologies.

Pour in fast-setting concrete, which offers the dual benefits of easy workability and quick curing time, critical for jobs necessitating minimal downtime. Ensure the mix is sufficiently fluid to flow around the gravel and thoroughly encapsulate the post base. Water should be added as per the manufacturer’s instructions, typically in an amount that slightly oversaturates, promoting a slow but complete setting process. As the concrete sets, regularly check the level to make any necessary adjustments, maintaining perfect alignment. Curing times may vary, so observe local weather conditions which can influence drying speed. Allow at least 24 to 48 hours for curing before stressing the post with additional strain, such as reattaching fence panels or applying gates. For ongoing protection against environmental stressors, consider applying a sealant specific to wood fencing. Such products mitigate water absorption and UV damage, extending the life expectancy of the post and fence as a whole. Regular inspection and maintenance can prevent the need for frequent repairs. Adjust sprinklers to avoid constant moisture exposure, and keep vegetation away to reduce insect activity. This preventative care will add years to the integrity of the entire fence system. Leveraging these practical steps not only ensures the repair is effective and durable but underscores the importance of quality craftsmanship and material selection. Adhering to these guidelines asserts authority in executing a reliable fence post repair, exemplifying trust through consistent and expert methodologies.
Next:
Latest news
-
Secure Your Space with Double Wire Mesh Fences
NewsJun.20,2025
-
Modern and Stylish 3D Fencing Solutions
NewsJun.20,2025
-
Enhance Your Garden with Beautiful Border Fences
NewsJun.20,2025
-
Enhance Security with High-Quality Fencing Solutions
NewsJun.20,2025
-
Elevate Your Space with Elegant Fencing Solutions
NewsJun.20,2025
-
Durable and Secure Fencing Solutions
NewsJun.20,2025