-
Email:zhao@hyliec.cn
-
Tel:+86 311 85273988
-
WhatsAPP:8613931128750
-
 Afrikaans
 -
 Albanian
 -
 Amharic
 -
 Arabic
 -
 Armenian
 -
 Azerbaijani
 -
 Basque
 -
 Belarusian
 -
 Bengali
 -
 Bosnian
 -
 Bulgarian
 -
 Catalan
 -
 Cebuano
 -
 Corsican
 -
 Croatian
 -
 Czech
Czech -
 Danish
 -
 Dutch
Dutch -
 English
 -
 Esperanto
 -
 Estonian
 -
 Finnish
 -
 French
 -
 Frisian
 -
 Galician
 -
 Georgian
 -
 German
 -
 Greek
Greek -
 Gujarati
 -
 Haitian Creole
 -
 hausa
hausa -
 hawaiian
 -
 Hebrew
 -
 Hindi
Hindi -
 Miao
Miao -
 Hungarian
 -
 Icelandic
 -
 igbo
igbo -
 Indonesian
 -
 irish
irish -
 Italian
 -
 Japanese
 -
 Javanese
 -
 Kannada
 -
 kazakh
 -
 Khmer
Khmer -
 Rwandese
 -
 Korean
 -
 Kurdish
 -
 Kyrgyz
 -
 Lao
Lao -
 Latin
Latin -
 Latvian
 -
 Lithuanian
 -
 Luxembourgish
 -
 Macedonian
 -
 Malgashi
 -
 Malay
Malay -
 Malayalam
 -
 Maltese
 -
 Maori
Maori -
 Marathi
 -
 Mongolian
 -
 Myanmar
 -
 Nepali
 -
 Norwegian
 -
 Norwegian
 -
 Occitan
 -
 Pashto
 -
 Persian
 -
 Polish
 -
 Portuguese
 -
 Punjabi
 -
 Romanian
 -
 Russian
 -
 Samoan
 -
 Scottish Gaelic
 -
 Serbian
 -
 Sesotho
 -
 Shona
Shona -
 Sindhi
 -
 Sinhala
 -
 Slovak
 -
 Slovenian
 -
 Somali
 -
 Spanish
 -
 Sundanese
 -
 Swahili
 -
 Swedish
 -
 Tagalog
 -
 Tajik
Tajik -
 Tamil
Tamil -
 Tatar
Tatar -
 Telugu
 -
 Thai
Thai -
 Turkish
 -
 Turkmen
 -
 Ukrainian
 -
 Urdu
Urdu -
 Uighur
 -
 Uzbek
Uzbek -
 Vietnamese
 -
 Welsh
Welsh -
 Bantu
Bantu -
 Yiddish
 -
 Yoruba
 -
 Zulu
Zulu
Step-by-Step Guide to Installing Your Garden Gate Efficiently and Effectively
Garden Gate Installation A Step-by-Step Guide
A garden gate serves as both a functional entryway and an aesthetic element that can enhance your outdoor space. Proper installation of a garden gate not only ensures durability but also adds to the beauty of your garden. Whether you’re a DIY enthusiast or hiring a professional, understanding the process can help you make informed decisions. Here’s a comprehensive guide to installing a garden gate.
Step 1 Choosing the Right Gate
Before diving into installation, it's crucial to select the right gate. Consider the style and material that best suits your garden. Wooden gates offer a natural look but require regular maintenance. Metal gates, such as wrought iron or aluminum, provide durability and security. Vinyl gates are low-maintenance and weather-resistant, making them a great choice for many homeowners. Make sure to measure the opening where the gate will be installed to ensure a proper fit.
Step 2 Gather Your Tools and Materials
Once you have your gate, gather the necessary tools and materials. Basic tools include a measuring tape, level, drill, screws, hinges, and a latch. Additionally, you will need concrete, gravel, and post anchors if you plan to install gate posts. It’s always wise to have a helper with you, as the installation process can be cumbersome, especially when handling heavy materials.
Step 3 Prepare the Site
Clear the area where the gate will be installed. Remove any obstructions, such as plants or debris, and level the ground if necessary. If you're installing gate posts, mark the exact locations where they will go. It’s important to ensure that your gate will swing open without interference from surrounding elements.
Step 4 Install Gate Posts
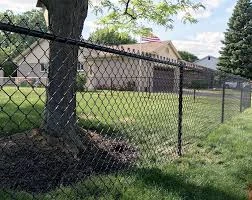
garden gate installation

If your gate requires posts, dig holes for the posts, ensuring they are at least 2 feet deep for stability. Place the posts in the holes and use a level to ensure they are vertical. Fill the holes with concrete or gravel for added support. Allow the concrete to cure according to the manufacturer’s instructions, typically 24 to 48 hours.
Step 5 Attach Hinges and Hang the Gate
Once the posts are securely in place, it’s time to attach the hinges. Position the gate against the posts and mark where the hinges will go. Pre-drill holes to avoid splitting the wood and then attach the hinges using screws. With a helper, lift the gate onto the hinges and ensure it swings freely. Make any necessary adjustments to the hinge placement for proper alignment.
Step 6 Install the Latch
Next, install the latch mechanism. This can vary greatly depending on the type of latch you choose, so follow the manufacturer's instructions carefully. Position the latch on the inside of the gate, making sure it aligns perfectly with the post to secure the gate when closed.
Step 7 Finishing Touches
Finally, add any finishing touches that will enhance the gate’s appearance. This could include painting or staining a wooden gate to protect it against the elements. Consider adding decorative elements such as trellises or climbing plants to complement the gate. Also, check the functionality of the gate, ensuring it opens and closes smoothly.
Conclusion
Installing a garden gate can be a rewarding project that improves the accessibility and visual appeal of your garden. By following these steps, you can ensure a successful installation that meets your needs and enhances your outdoor space. Whether you decide to take on the project yourself or hire a professional, a well-installed garden gate will provide you with years of enjoyment and practicality. Happy gardening!
-
Secure Your Space with Double Wire Mesh Fences
NewsJun.20,2025
-
Modern and Stylish 3D Fencing Solutions
NewsJun.20,2025
-
Enhance Your Garden with Beautiful Border Fences
NewsJun.20,2025
-
Enhance Security with High-Quality Fencing Solutions
NewsJun.20,2025
-
Elevate Your Space with Elegant Fencing Solutions
NewsJun.20,2025
-
Durable and Secure Fencing Solutions
NewsJun.20,2025
