-
Email:zhao@hyliec.cn
-
Tel:+86 311 85273988
-
WhatsAPP:8613931128750
-
 Afrikaans
 -
 Albanian
 -
 Amharic
 -
 Arabic
 -
 Armenian
 -
 Azerbaijani
 -
 Basque
 -
 Belarusian
 -
 Bengali
 -
 Bosnian
 -
 Bulgarian
 -
 Catalan
 -
 Cebuano
 -
 Corsican
 -
 Croatian
 -
 Czech
Czech -
 Danish
 -
 Dutch
Dutch -
 English
 -
 Esperanto
 -
 Estonian
 -
 Finnish
 -
 French
 -
 Frisian
 -
 Galician
 -
 Georgian
 -
 German
 -
 Greek
Greek -
 Gujarati
 -
 Haitian Creole
 -
 hausa
hausa -
 hawaiian
 -
 Hebrew
 -
 Hindi
Hindi -
 Miao
Miao -
 Hungarian
 -
 Icelandic
 -
 igbo
igbo -
 Indonesian
 -
 irish
irish -
 Italian
 -
 Japanese
 -
 Javanese
 -
 Kannada
 -
 kazakh
 -
 Khmer
Khmer -
 Rwandese
 -
 Korean
 -
 Kurdish
 -
 Kyrgyz
 -
 Lao
Lao -
 Latin
Latin -
 Latvian
 -
 Lithuanian
 -
 Luxembourgish
 -
 Macedonian
 -
 Malgashi
 -
 Malay
Malay -
 Malayalam
 -
 Maltese
 -
 Maori
Maori -
 Marathi
 -
 Mongolian
 -
 Myanmar
 -
 Nepali
 -
 Norwegian
 -
 Norwegian
 -
 Occitan
 -
 Pashto
 -
 Persian
 -
 Polish
 -
 Portuguese
 -
 Punjabi
 -
 Romanian
 -
 Russian
 -
 Samoan
 -
 Scottish Gaelic
 -
 Serbian
 -
 Sesotho
 -
 Shona
Shona -
 Sindhi
 -
 Sinhala
 -
 Slovak
 -
 Slovenian
 -
 Somali
 -
 Spanish
 -
 Sundanese
 -
 Swahili
 -
 Swedish
 -
 Tagalog
 -
 Tajik
Tajik -
 Tamil
Tamil -
 Tatar
Tatar -
 Telugu
 -
 Thai
Thai -
 Turkish
 -
 Turkmen
 -
 Ukrainian
 -
 Urdu
Urdu -
 Uighur
 -
 Uzbek
Uzbek -
 Vietnamese
 -
 Welsh
Welsh -
 Bantu
Bantu -
 Yiddish
 -
 Yoruba
 -
 Zulu
Zulu
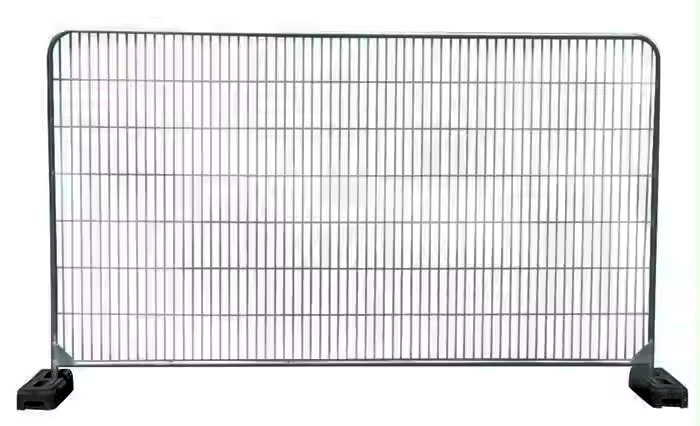
attaching fence panels to posts
Attaching Fence Panels to Posts A Comprehensive Guide
Fencing is an essential aspect of landscaping and property management, serving vital functions such as security, privacy, and aesthetics. Among the various fencing types, the installation of fence panels attached to posts stands out for its durability and ease of maintenance. This article will provide a detailed overview of how to effectively attach fence panels to posts, ensuring a sturdy and long-lasting structure.
1. Choose the Right Materials
Before you begin the attachment process, it's crucial to select the right materials for both your fence panels and posts. Common materials include wood, vinyl, and metal, each providing unique benefits. Wooden panels offer a classic look but require periodic treatment to prevent rot. Vinyl panels, however, are low maintenance and resistant to weather, while metal panels can provide a modern aesthetic with excellent durability.
When selecting fence posts, opt for materials that will withstand the elements. Pressure-treated wood or galvanized metal is typically recommended, as they resist decay and corrosion.
2. Prepare Your Tools
Having the right tools at your disposal will streamline the installation process. Gather the following tools
- Power drill or screwdriver - Level - Tape measure - Square - Post hole digger or auger - Concrete mix (if needed) - Fence panel brackets or screws
Preparation is key; ensure that your tools are in good condition and that you have all materials on-site before commencing work.
3. Measure and Place the Fence Posts
Start by determining the desired layout of your fence and the spacing between the posts. A common recommendation is to space the posts every 6 to 8 feet. Once you have established the measurements, use a post hole digger or auger to create holes for the fence posts. The depth of these holes should be at least one-third the length of the posts above ground, typically 2 to 3 feet deep, depending on local codes and climate conditions.
attaching fence panels to posts

Place each post into its respective hole, ensuring it is vertical by using a level and square. If necessary, adjust the post before securing it in place. To secure the posts, fill the holes with concrete mix. Allow the concrete to cure as per the manufacturer’s instructions, usually 24 to 48 hours.
Once the posts are securely set, you can begin attaching the fence panels. Depending on the design of your panels, you may use screws or brackets for this step.
If using screws, pre-drill holes in both the fence panels and the posts to prevent splitting. Align the panel with the post and drive screws through the panel into the post, ensuring it is flush and secure. For added stability, attach panels at both the top and bottom.
Alternatively, if your panels come with brackets, follow the manufacturer's instructions to secure the brackets to both the panel and the post. This method is often easier and provides a quick way to ensure tight connections.
5. Final Adjustments
After attaching all the panels, take a step back and inspect your work. Check for levelness and alignment. Make any necessary adjustments by loosening screws or shifting panels. Once you are satisfied, perform a final tightening of all screws or brackets.
6. Regular Maintenance
To keep your fence panels looking their best and functioning properly, implement a regular maintenance schedule. This may involve cleaning the panels, checking for loose screws, and treating wood panels to protect against rot and pests.
Conclusion
Attaching fence panels to posts is a manageable task that significantly enhances your property. By selecting appropriate materials, preparing adequately, and following the steps outlined, you can create a durable fence that meets your needs. With careful planning and execution, your fence will provide security and beauty for years to come.
-
garden-fence-on-a-roll-versatile-solutions-for-outdoor-enclosure-and-decoration
NewsAug.22,2025
-
fence-post-varieties-essential-components-for-durable-enclosures
NewsAug.22,2025
-
garden-fence-panels-blending-functionality-and-aesthetic-appeal
NewsAug.22,2025
-
tools-for-fence-essential-equipment-for-garden-fence-installation-and-maintenance
NewsAug.22,2025
-
fence-and-gate-accessories-enhancing-functionality-and-durability
NewsAug.22,2025
-
metal-plant-supports-essential-structures-for-healthy-plant-growth
NewsAug.22,2025
