-
Email:zhao@hyliec.cn
-
Tel:+86 311 85273988
-
WhatsAPP:8613931128750
-
 Afrikaans
 -
 Albanian
 -
 Amharic
 -
 Arabic
 -
 Armenian
 -
 Azerbaijani
 -
 Basque
 -
 Belarusian
 -
 Bengali
 -
 Bosnian
 -
 Bulgarian
 -
 Catalan
 -
 Cebuano
 -
 Corsican
 -
 Croatian
 -
 Czech
Czech -
 Danish
 -
 Dutch
Dutch -
 English
 -
 Esperanto
 -
 Estonian
 -
 Finnish
 -
 French
 -
 Frisian
 -
 Galician
 -
 Georgian
 -
 German
 -
 Greek
Greek -
 Gujarati
 -
 Haitian Creole
 -
 hausa
hausa -
 hawaiian
 -
 Hebrew
 -
 Hindi
Hindi -
 Miao
Miao -
 Hungarian
 -
 Icelandic
 -
 igbo
igbo -
 Indonesian
 -
 irish
irish -
 Italian
 -
 Japanese
 -
 Javanese
 -
 Kannada
 -
 kazakh
 -
 Khmer
Khmer -
 Rwandese
 -
 Korean
 -
 Kurdish
 -
 Kyrgyz
 -
 Lao
Lao -
 Latin
Latin -
 Latvian
 -
 Lithuanian
 -
 Luxembourgish
 -
 Macedonian
 -
 Malgashi
 -
 Malay
Malay -
 Malayalam
 -
 Maltese
 -
 Maori
Maori -
 Marathi
 -
 Mongolian
 -
 Myanmar
 -
 Nepali
 -
 Norwegian
 -
 Norwegian
 -
 Occitan
 -
 Pashto
 -
 Persian
 -
 Polish
 -
 Portuguese
 -
 Punjabi
 -
 Romanian
 -
 Russian
 -
 Samoan
 -
 Scottish Gaelic
 -
 Serbian
 -
 Sesotho
 -
 Shona
Shona -
 Sindhi
 -
 Sinhala
 -
 Slovak
 -
 Slovenian
 -
 Somali
 -
 Spanish
 -
 Sundanese
 -
 Swahili
 -
 Swedish
 -
 Tagalog
 -
 Tajik
Tajik -
 Tamil
Tamil -
 Tatar
Tatar -
 Telugu
 -
 Thai
Thai -
 Turkish
 -
 Turkmen
 -
 Ukrainian
 -
 Urdu
Urdu -
 Uighur
 -
 Uzbek
Uzbek -
 Vietnamese
 -
 Welsh
Welsh -
 Bantu
Bantu -
 Yiddish
 -
 Yoruba
 -
 Zulu
Zulu
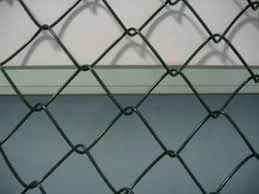
making a chicken wire fence
How to Make a Chicken Wire Fence
Creating a chicken wire fence is a practical solution for protecting your garden or keeping your chickens safe from predators. This guide will walk you through the essential steps and considerations involved in making a sturdy and effective chicken wire fence.
Materials Needed
Before you begin, gather the necessary materials
1. Chicken Wire Choose an appropriate gauge for your needs. A heavier gauge will be more durable, while a lighter one may be easier to handle. 2. Fence Posts Wooden or metal posts are suitable; choose a type that resonates with your aesthetic and functional requirements. 3. Wire Cutters Essential for cutting the chicken wire to your desired lengths. 4. Staples or Nails These will secure the chicken wire to the posts. 5. Post Hole Digger If you're installing wooden posts, a post hole digger will help you create deep, sturdy holes. 6. Hammer or Staple Gun To attach the wire to the posts. 7. Level Ensures that your fence is straight and uniform.
Step-by-Step Guide
1. Planning the Layout Determine the area you want to enclose. Measure it carefully and mark the corners with stakes. This planning stage is essential for ensuring that your fence will fit the designated area.
making a chicken wire fence

2. Installing the Fence Posts Using a post hole digger, create holes for your fence posts approximately 6 to 8 feet apart. The depth of the holes should be about one-third of the post height, typically around 2 feet deep for stability. Place the posts in the holes, ensuring they are level before filling them with concrete or tamping the soil firmly around them.
3. Cutting the Chicken Wire Once your posts are installed, roll out the chicken wire along the perimeter of your layout. Use wire cutters to cut the chicken wire to the necessary length. Leave a little extra to overlap if you need to secure it at the ends.
4. Attaching the Chicken Wire to the Posts Start at one end and secure the chicken wire using staples or nails. If using nails, hammer them into the post at an angle for better grip. Make sure the chicken wire is tight and straight. Continue attaching it around the perimeter, ensuring there are no gaps where chickens or other animals can escape or enter.
5. Finishing Touches Once the chicken wire is securely attached, trim any excess wire with your wire cutters. If desired, you can add a gate for easy access, ensuring it is designed to close securely and prevent escapes.
Maintenance Tips
After constructing your fence, it is crucial to maintain it. Regularly check for any signs of wear or damage, especially after severe weather. Tighten any loose sections and replace damaged wire promptly to ensure your chickens remain safe and secure.
In conclusion, building a chicken wire fence is a rewarding DIY project that can protect your livestock and enhance your garden's security. With careful planning and attention to detail, you can create a fence that serves its purpose effectively for years to come.
-
Garden Fence on a Roll: Versatile Solutions for Outdoor Enclosure and Decoration
NewsAug.22,2025
-
Fence Post Varieties: Essential Components for Durable Enclosures
NewsAug.22,2025
-
Garden Fence Panels: Blending Functionality and Aesthetic Appeal
NewsAug.22,2025
-
Tools for Fence: Essential Equipment for Garden Fence Installation and Maintenance
NewsAug.22,2025
-
Fence and Gate Accessories: Enhancing Functionality and Durability
NewsAug.22,2025
-
Metal Plant Supports: Essential Structures for Healthy Plant Growth
NewsAug.22,2025
