-
Email:zhao@hyliec.cn
-
Tel:+86 311 85273988
-
WhatsAPP:8613931128750
-
 Afrikaans
 -
 Albanian
 -
 Amharic
 -
 Arabic
 -
 Armenian
 -
 Azerbaijani
 -
 Basque
 -
 Belarusian
 -
 Bengali
 -
 Bosnian
 -
 Bulgarian
 -
 Catalan
 -
 Cebuano
 -
 Corsican
 -
 Croatian
 -
 Czech
Czech -
 Danish
 -
 Dutch
Dutch -
 English
 -
 Esperanto
 -
 Estonian
 -
 Finnish
 -
 French
 -
 Frisian
 -
 Galician
 -
 Georgian
 -
 German
 -
 Greek
Greek -
 Gujarati
 -
 Haitian Creole
 -
 hausa
hausa -
 hawaiian
 -
 Hebrew
 -
 Hindi
Hindi -
 Miao
Miao -
 Hungarian
 -
 Icelandic
 -
 igbo
igbo -
 Indonesian
 -
 irish
irish -
 Italian
 -
 Japanese
 -
 Javanese
 -
 Kannada
 -
 kazakh
 -
 Khmer
Khmer -
 Rwandese
 -
 Korean
 -
 Kurdish
 -
 Kyrgyz
 -
 Lao
Lao -
 Latin
Latin -
 Latvian
 -
 Lithuanian
 -
 Luxembourgish
 -
 Macedonian
 -
 Malgashi
 -
 Malay
Malay -
 Malayalam
 -
 Maltese
 -
 Maori
Maori -
 Marathi
 -
 Mongolian
 -
 Myanmar
 -
 Nepali
 -
 Norwegian
 -
 Norwegian
 -
 Occitan
 -
 Pashto
 -
 Persian
 -
 Polish
 -
 Portuguese
 -
 Punjabi
 -
 Romanian
 -
 Russian
 -
 Samoan
 -
 Scottish Gaelic
 -
 Serbian
 -
 Sesotho
 -
 Shona
Shona -
 Sindhi
 -
 Sinhala
 -
 Slovak
 -
 Slovenian
 -
 Somali
 -
 Spanish
 -
 Sundanese
 -
 Swahili
 -
 Swedish
 -
 Tagalog
 -
 Tajik
Tajik -
 Tamil
Tamil -
 Tatar
Tatar -
 Telugu
 -
 Thai
Thai -
 Turkish
 -
 Turkmen
 -
 Ukrainian
 -
 Urdu
Urdu -
 Uighur
 -
 Uzbek
Uzbek -
 Vietnamese
 -
 Welsh
Welsh -
 Bantu
Bantu -
 Yiddish
 -
 Yoruba
 -
 Zulu
Zulu
Professional Field Fence Installation Services
Field Fence Installation A Step-by-Step Guide
Installing a field fence is an essential task for anyone looking to protect livestock, secure boundaries, or create an enclosure for agricultural purposes. Whether you are a seasoned farmer or a first-time landowner, understanding the proper steps for field fence installation can save you time and resources. Here’s a comprehensive guide to help you through the process.
Step 1 Planning and Preparation
Before you start digging, it's crucial to plan your fence layout. Identify the area you want to enclose and measure the perimeter carefully. Consider the purpose of the fence—whether it’s to contain animals or mark property lines—as this will determine specific requirements, such as height and material. Check local regulations and guidelines to ensure compliance with zoning laws.
Step 2 Choosing the Right Materials
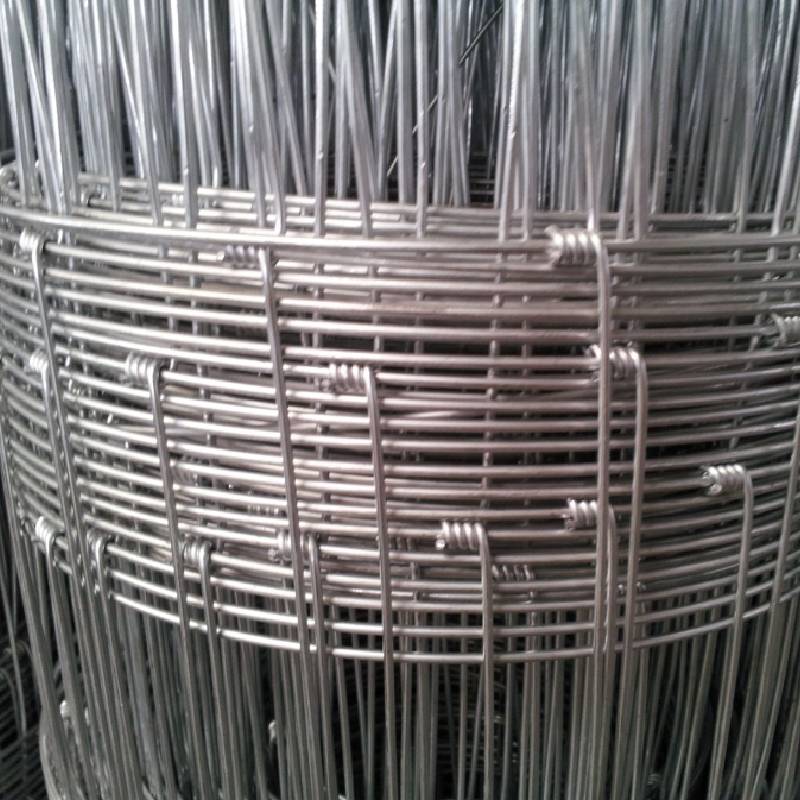
Selecting the appropriate materials is key to the success of your fence installation. Field fencing typically comes in various types, including barbed wire, woven wire, and high-tensile fencing. Each type has its benefits; for example, barbed wire is effective for livestock control, while woven wire provides robust protection against smaller animals. Additionally, you’ll need fence posts—wood or metal—insulators for electric fences if applicable, and staples or fencing clips for secure attachment.
Step 3 Installing the Fence Posts
field fence installation

Once you have your materials, it's time to install the posts. Mark the locations where the posts will be placed, ideally every 8 to 12 feet, depending on the terrain and fencing type. Use a post hole digger to create holes about 2-3 feet deep (or one-third the post height) to ensure stability. Insert the posts into the holes, ensuring they are level and plumb, then backfill with soil or concrete for extra support.
Step 4 Attaching the Fencing
With the posts securely in place, it’s time to attach the fencing material. Start at one end of the fence line and unroll the fence towards the other end, ensuring it is taut but not overly stretched. Use staples, clips, or other fasteners to secure the fencing to the posts. When working with barbed wire, wear gloves to prevent injuries, and maintain a gap of at least 12 inches between the bottom wire and ground level for animals to pass safely underneath.
Step 5 Final Touches and Maintenance
After the fence is installed, conduct a thorough inspection to ensure everything is secure and intact. Trim any excess foliage near the fence, as it can compromise the integrity of your installation. Regular maintenance is essential, including checking for loose wires, rust, or damage, which can occur over time. A well-maintained fence will serve you for years, providing protection and peace of mind.
By following these steps, you can successfully install a field fence that meets your needs, ensuring your land and livestock are safe and secure. Whether you tackle this project yourself or hire professionals, understanding the process will help you achieve the best results.
-
Secure Your Space with Double Wire Mesh Fences
NewsJun.20,2025
-
Modern and Stylish 3D Fencing Solutions
NewsJun.20,2025
-
Enhance Your Garden with Beautiful Border Fences
NewsJun.20,2025
-
Enhance Security with High-Quality Fencing Solutions
NewsJun.20,2025
-
Elevate Your Space with Elegant Fencing Solutions
NewsJun.20,2025
-
Durable and Secure Fencing Solutions
NewsJun.20,2025
