
-
Email:zhao@hyliec.cn
-
Tel:+86 311 85273988
-
WhatsAPP:8613931128750
-
 Afrikaans
 -
 Albanian
 -
 Amharic
 -
 Arabic
 -
 Armenian
 -
 Azerbaijani
 -
 Basque
 -
 Belarusian
 -
 Bengali
 -
 Bosnian
 -
 Bulgarian
 -
 Catalan
 -
 Cebuano
 -
 Corsican
 -
 Croatian
 -
 Czech
Czech -
 Danish
 -
 Dutch
Dutch -
 English
 -
 Esperanto
 -
 Estonian
 -
 Finnish
 -
 French
 -
 Frisian
 -
 Galician
 -
 Georgian
 -
 German
 -
 Greek
Greek -
 Gujarati
 -
 Haitian Creole
 -
 hausa
hausa -
 hawaiian
 -
 Hebrew
 -
 Hindi
Hindi -
 Miao
Miao -
 Hungarian
 -
 Icelandic
 -
 igbo
igbo -
 Indonesian
 -
 irish
irish -
 Italian
 -
 Japanese
 -
 Javanese
 -
 Kannada
 -
 kazakh
 -
 Khmer
Khmer -
 Rwandese
 -
 Korean
 -
 Kurdish
 -
 Kyrgyz
 -
 Lao
Lao -
 Latin
Latin -
 Latvian
 -
 Lithuanian
 -
 Luxembourgish
 -
 Macedonian
 -
 Malgashi
 -
 Malay
Malay -
 Malayalam
 -
 Maltese
 -
 Maori
Maori -
 Marathi
 -
 Mongolian
 -
 Myanmar
 -
 Nepali
 -
 Norwegian
 -
 Norwegian
 -
 Occitan
 -
 Pashto
 -
 Persian
 -
 Polish
 -
 Portuguese
 -
 Punjabi
 -
 Romanian
 -
 Russian
 -
 Samoan
 -
 Scottish Gaelic
 -
 Serbian
 -
 Sesotho
 -
 Shona
Shona -
 Sindhi
 -
 Sinhala
 -
 Slovak
 -
 Slovenian
 -
 Somali
 -
 Spanish
 -
 Sundanese
 -
 Swahili
 -
 Swedish
 -
 Tagalog
 -
 Tajik
Tajik -
 Tamil
Tamil -
 Tatar
Tatar -
 Telugu
 -
 Thai
Thai -
 Turkish
 -
 Turkmen
 -
 Ukrainian
 -
 Urdu
Urdu -
 Uighur
 -
 Uzbek
Uzbek -
 Vietnamese
 -
 Welsh
Welsh -
 Bantu
Bantu -
 Yiddish
 -
 Yoruba
 -
 Zulu
Zulu
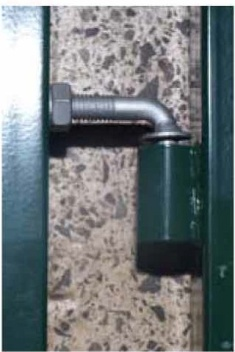
fixing a gate post
Fixing a Gate Post Step-by-Step Guide
A sturdy gate is essential for both security and aesthetics in any property. However, over time, gate posts can become weakened due to weather damage, rotting, or simply the test of time. Fixing a gate post may seem like a daunting task, but with the right tools and a bit of patience, you can restore your gate's function and improve the overall look of your property. Here’s a comprehensive guide to help you fix your gate post.
Assessing the Damage
The first step in fixing a gate post is to carefully assess its condition. Look for signs of rot, cracks, or instability. If the post leans, it might be due to weak concrete or a damaged foundation. Check for any insects such as termites that may have sought refuge in the wood. Identifying the problem accurately will help you decide what repairs need to be made.
Tools and Materials Needed
Before starting the repair, gather the necessary tools and materials
- Post-level - Drill - Wood or metal replacement post - Concrete mix or post foam - Screws and brackets - Safety gear (gloves and goggles) - Shovel (if digging is required) - Measuring tape - Saw (if wood needs to be cut)
Removing the Existing Gate Post
If the post is severely damaged and cannot be repaired, you will need to remove it. First, remove the gate from the hinges to lighten the load. Use a drill or a wrench to unscrew any fasteners. If the post is set in concrete, you may need to dig around it to reach the base. Be prepared for some physical labor — using a pry bar can help in loosening stubborn posts.
Installing the New Gate Post
Once the old gate post is removed, it's time to install the new one. Start by measuring the depth required for the post. Standard gate posts typically need to be buried at least one-third of their length for stability. Using a shovel, dig a hole according to the measurements.
fixing a gate post
Next, place the new post into the hole. If it's a wooden post, consider treating it with a wood preservative to extend its lifespan. Check for vertical alignment using a post-level, ensuring that it is perfectly upright. Hold the post in place while you prepare to secure it.
Securing the Gate Post
To secure the post, fill the hole with concrete mix or use post foam, following the manufacturer's instructions for mixing. Pour the concrete or foam around the post, ensuring it's well packed to eliminate air pockets. Allow the material to set according to the instructions, typically 24 to 48 hours for concrete.
If using a wooden post, adding a few gravel stones at the bottom of the hole can help with drainage, preventing moisture buildup. This additional step can prolong the life of the post.
Attaching the Gate
With the new post securely in place, it’s time to reattach the gate. Holding the gate at the proper angle, use the previously removed hinges to secure it back onto the post. Make sure the gate opens and closes effortlessly without dragging on the ground or rubbing against the post. Adjustments can be made by loosening screws and repositioning the hinges, if necessary.
Final Touches
Once everything is in place, take a step back and admire your work. Painting or staining the new post can help with aesthetics and add a layer of protection against the elements. Regular maintenance checks will ensure your gate post remains in excellent condition for years to come.
Conclusion
Fixing a gate post is a manageable DIY project that can significantly enhance the functionality and appearance of your property. Whether you’re dealing with a simple repair or a complete replacement, following these steps makes the task straightforward. Remember to take your time and ensure that each step is done correctly, as the stability of your gate relies on a strong post. With patience and careful work, you’ll have a beautiful, functional gate that lasts for years to come.
-
Well Casing Extension Couplings – Applications and Installation
NewsMay.19,2025
-
Stylish Garden Gates for Sale – Enhance Your Outdoor Space
NewsMay.19,2025
-
Fencing Wire Roll Maintenance – How to Make It Last Longer
NewsMay.19,2025
-
Different Types of Fence Posts for Various Fencing Needs
NewsMay.19,2025
-
Creative Ways to Use Panel Fencing in Your Garden
NewsMay.19,2025
-
Plant Supports Wholesale
NewsMay.13,2025