-
Email:zhao@hyliec.cn
-
Tel:+86 311 85273988
-
WhatsAPP:8613931128750
-
 Afrikaans
 -
 Albanian
 -
 Amharic
 -
 Arabic
 -
 Armenian
 -
 Azerbaijani
 -
 Basque
 -
 Belarusian
 -
 Bengali
 -
 Bosnian
 -
 Bulgarian
 -
 Catalan
 -
 Cebuano
 -
 Corsican
 -
 Croatian
 -
 Czech
Czech -
 Danish
 -
 Dutch
Dutch -
 English
 -
 Esperanto
 -
 Estonian
 -
 Finnish
 -
 French
 -
 Frisian
 -
 Galician
 -
 Georgian
 -
 German
 -
 Greek
Greek -
 Gujarati
 -
 Haitian Creole
 -
 hausa
hausa -
 hawaiian
 -
 Hebrew
 -
 Hindi
Hindi -
 Miao
Miao -
 Hungarian
 -
 Icelandic
 -
 igbo
igbo -
 Indonesian
 -
 irish
irish -
 Italian
 -
 Japanese
 -
 Javanese
 -
 Kannada
 -
 kazakh
 -
 Khmer
Khmer -
 Rwandese
 -
 Korean
 -
 Kurdish
 -
 Kyrgyz
 -
 Lao
Lao -
 Latin
Latin -
 Latvian
 -
 Lithuanian
 -
 Luxembourgish
 -
 Macedonian
 -
 Malgashi
 -
 Malay
Malay -
 Malayalam
 -
 Maltese
 -
 Maori
Maori -
 Marathi
 -
 Mongolian
 -
 Myanmar
 -
 Nepali
 -
 Norwegian
 -
 Norwegian
 -
 Occitan
 -
 Pashto
 -
 Persian
 -
 Polish
 -
 Portuguese
 -
 Punjabi
 -
 Romanian
 -
 Russian
 -
 Samoan
 -
 Scottish Gaelic
 -
 Serbian
 -
 Sesotho
 -
 Shona
Shona -
 Sindhi
 -
 Sinhala
 -
 Slovak
 -
 Slovenian
 -
 Somali
 -
 Spanish
 -
 Sundanese
 -
 Swahili
 -
 Swedish
 -
 Tagalog
 -
 Tajik
Tajik -
 Tamil
Tamil -
 Tatar
Tatar -
 Telugu
 -
 Thai
Thai -
 Turkish
 -
 Turkmen
 -
 Ukrainian
 -
 Urdu
Urdu -
 Uighur
 -
 Uzbek
Uzbek -
 Vietnamese
 -
 Welsh
Welsh -
 Bantu
Bantu -
 Yiddish
 -
 Yoruba
 -
 Zulu
Zulu
How to Install Chicken Wire Under Your Deck for Effective Pest Control
Installing Chicken Wire Under Your Deck A Comprehensive Guide
When it comes to home improvement projects, the spaces beneath our decks often get overlooked. However, this under-deck area can serve multiple purposes, from storage to pest control. One excellent solution for deterring unwanted critters from taking up residence beneath your deck is to install chicken wire. This article will guide you through the steps needed to effectively install chicken wire under your deck, ensuring you keep your outdoor space both clean and critter-free.
Why Use Chicken Wire?
Chicken wire is a versatile and cost-effective material made from galvanized steel. It is primarily used for fencing, but its lightweight and durable nature makes it ideal for many projects. One of the significant benefits of using chicken wire under your deck includes its ability to prevent pests like rodents, snakes, and larger wildlife from accessing the space. Moreover, it allows for air circulation, which can help prevent moisture buildup and subsequent wood rot or mold issues under your deck.
Step-by-Step Installation Guide
1. Gather Your Materials - Chicken wire (rolls come in various sizes) - Wire cutters - Staple gun or heavy-duty staples - Garden gloves - Hammer - Ground staples or U-shaped pins (optional)
2. Prepare the Area Before you begin, clean the underside of your deck. Remove any debris, old leaves, or trash that may have accumulated there. This will give you a clear space to work in and help ensure that the chicken wire sits flush against the ground.
3. Measure Your Space Measure the dimensions of the area you want to cover with chicken wire. Ensure you take note of any support beams, posts, or other structures that may require special attention during installation.
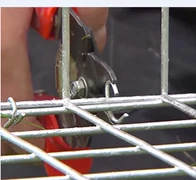
4. Cut the Chicken Wire Based on your measurements, cut the chicken wire to size. It is beneficial to leave a little extra length on each side for easier fastening. Be cautious while handling wire cutters to avoid injury.
installing chicken wire under deck

5. Secure the Chicken Wire Position the chicken wire underneath your deck. Use a staple gun to attach it to the frame or joists of your deck. Work methodically from one end to the other, ensuring the wire is taut but not overly stretched. Space the staples about every 6 to 12 inches along the edges of the wire to secure it properly.
6. Add Ground Staples (Optional) For additional security, particularly if you live in an area prone to heavy winds or curious animals, consider using ground staples or U-shaped pins to anchor the chicken wire to the ground. This will prevent any gaps that could allow pests to squeeze through.
7. Trim Excess Wire After securing the chicken wire, trim any excess material that may be hanging beyond the edges. Ensure there are no sharp edges exposed as these could be hazardous for kids and pets.
8. Review and Test Once you've completed the installation, review your work and check for any areas that may need reinforcement. You want to ensure that pests cannot easily dig under or find their way through any gaps.
Maintenance
After installing chicken wire, check it periodically for any signs of wear and tear. Over time, weather conditions can cause the wire to sag or become loose. If you notice any damage, promptly repair it to maintain the barrier's effectiveness.
Conclusion
Installing chicken wire under your deck is a straightforward and effective solution to keep unwanted animals at bay and protect your outdoor space. With the right tools and materials, you’ll have the peace of mind that your deck remains a safe and clean area. Whether you're interested in enhancing storage options or simply maintaining a tidy backyard, this project will make your outdoor experience more enjoyable. Happy DIYing!
