-
Email:zhao@hyliec.cn
-
Tel:+86 311 85273988
-
WhatsAPP:8613931128750
-
 Afrikaans
 -
 Albanian
 -
 Amharic
 -
 Arabic
 -
 Armenian
 -
 Azerbaijani
 -
 Basque
 -
 Belarusian
 -
 Bengali
 -
 Bosnian
 -
 Bulgarian
 -
 Catalan
 -
 Cebuano
 -
 Corsican
 -
 Croatian
 -
 Czech
Czech -
 Danish
 -
 Dutch
Dutch -
 English
 -
 Esperanto
 -
 Estonian
 -
 Finnish
 -
 French
 -
 Frisian
 -
 Galician
 -
 Georgian
 -
 German
 -
 Greek
Greek -
 Gujarati
 -
 Haitian Creole
 -
 hausa
hausa -
 hawaiian
 -
 Hebrew
 -
 Hindi
Hindi -
 Miao
Miao -
 Hungarian
 -
 Icelandic
 -
 igbo
igbo -
 Indonesian
 -
 irish
irish -
 Italian
 -
 Japanese
 -
 Javanese
 -
 Kannada
 -
 kazakh
 -
 Khmer
Khmer -
 Rwandese
 -
 Korean
 -
 Kurdish
 -
 Kyrgyz
 -
 Lao
Lao -
 Latin
Latin -
 Latvian
 -
 Lithuanian
 -
 Luxembourgish
 -
 Macedonian
 -
 Malgashi
 -
 Malay
Malay -
 Malayalam
 -
 Maltese
 -
 Maori
Maori -
 Marathi
 -
 Mongolian
 -
 Myanmar
 -
 Nepali
 -
 Norwegian
 -
 Norwegian
 -
 Occitan
 -
 Pashto
 -
 Persian
 -
 Polish
 -
 Portuguese
 -
 Punjabi
 -
 Romanian
 -
 Russian
 -
 Samoan
 -
 Scottish Gaelic
 -
 Serbian
 -
 Sesotho
 -
 Shona
Shona -
 Sindhi
 -
 Sinhala
 -
 Slovak
 -
 Slovenian
 -
 Somali
 -
 Spanish
 -
 Sundanese
 -
 Swahili
 -
 Swedish
 -
 Tagalog
 -
 Tajik
Tajik -
 Tamil
Tamil -
 Tatar
Tatar -
 Telugu
 -
 Thai
Thai -
 Turkish
 -
 Turkmen
 -
 Ukrainian
 -
 Urdu
Urdu -
 Uighur
 -
 Uzbek
Uzbek -
 Vietnamese
 -
 Welsh
Welsh -
 Bantu
Bantu -
 Yiddish
 -
 Yoruba
 -
 Zulu
Zulu
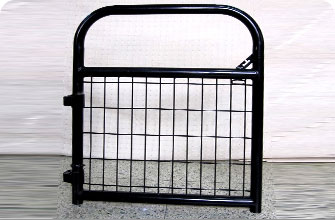
garden fence with posts
Building a Garden Fence with Posts
Creating a garden fence with posts is an excellent project for any gardening enthusiast looking to enhance their outdoor space. A well-designed fence not only serves as a boundary for your garden but also adds aesthetic appeal and provides security for your plants. In this article, we will explore the steps involved in building a sturdy and attractive garden fence.
Planning Your Fence
Before jumping into the construction, it's crucial to plan out your garden fence. Start by measuring the area you would like to enclose. Consider the height of the fence based on the purpose it serves; for example, if you have pets or kids, a taller fence would be more suitable. Additionally, decide on the style of the fence, whether it will be a picket fence, a privacy fence, or something decorative.
Selecting Materials
Once you have your design in mind, the next step is to choose your materials. Most garden fences are made from wood, vinyl, or metal. Wood is a popular choice due to its natural look and ease of installation. Pressure-treated lumber is ideal for posts as it resists rot and weathering. If you prefer a low-maintenance option, vinyl fencing is durable and comes in various styles. Chain link or wrought iron fences can add a classic touch but may require more maintenance over time.
Gathering Tools
Before starting the construction, gather all necessary tools. You will typically need a post hole digger, a level, a measuring tape, a saw, and nails or screws, depending on the type of fence you choose. If you're using concrete to secure your posts, a mixing bucket or wheelbarrow may be needed. Having all tools on hand will streamline the installation process.
garden fence with posts

Installing Posts
The most critical part of building a fence is setting the posts. Begin by marking the locations for each post based on your measurements. The distance between posts typically ranges from 6 to 8 feet, depending on the style of fence. Dig holes for the posts at least 2 feet deep, ensuring they are level. Place the posts in the holes and fill them with concrete or dirt, tamping it down to ensure stability. Allow the posts to set for at least 24 hours before proceeding.
Adding the Panels
Once the posts are secure, it’s time to attach the panels. Cut the panels to size as necessary and use nails or screws to fix them to the posts. Make sure everything is level and aligned. For added durability, you might want to apply a weather-resistant sealant to protect the wood from the elements.
Finishing Touches
After the panels are attached, consider adding finishing touches such as paint or stain to enhance the appearance of the fence and improve its longevity. You might also want to plant climbing vines or install decorative elements like post caps to complement the fence design.
Conclusion
Building a garden fence with posts can be a rewarding project that enhances both the functionality and beauty of your outdoor space. With careful planning, the right materials, and a little elbow grease, you can create a garden fence that not only holds the boundary of your garden but also adds a personal touch to your property. Happy gardening!
-
Garden Gates: Blending Functionality and Aesthetic Appeal
NewsAug.11,2025
-
Houseplant Supports and Related Products: Essential Aids for Plant Health
NewsAug.11,2025
-
Wire Fencing Rolls: Secure Your Space with Style
NewsJul.17,2025
-
Strong and Durable Round Fence Posts for Every Need
NewsJul.17,2025
-
Square Metal Posts: Strength and Style for Your Outdoor Space
NewsJul.17,2025
-
Revolutionize Your Garden with Innovative Garden Posts
NewsJul.17,2025
