
-
Email:zhao@hyliec.cn
-
Tel:+86 311 85273988
-
WhatsAPP:8613931128750
-
 Afrikaans
 -
 Albanian
 -
 Amharic
 -
 Arabic
 -
 Armenian
 -
 Azerbaijani
 -
 Basque
 -
 Belarusian
 -
 Bengali
 -
 Bosnian
 -
 Bulgarian
 -
 Catalan
 -
 Cebuano
 -
 Corsican
 -
 Croatian
 -
 Czech
Czech -
 Danish
 -
 Dutch
Dutch -
 English
 -
 Esperanto
 -
 Estonian
 -
 Finnish
 -
 French
 -
 Frisian
 -
 Galician
 -
 Georgian
 -
 German
 -
 Greek
Greek -
 Gujarati
 -
 Haitian Creole
 -
 hausa
hausa -
 hawaiian
 -
 Hebrew
 -
 Hindi
Hindi -
 Miao
Miao -
 Hungarian
 -
 Icelandic
 -
 igbo
igbo -
 Indonesian
 -
 irish
irish -
 Italian
 -
 Japanese
 -
 Javanese
 -
 Kannada
 -
 kazakh
 -
 Khmer
Khmer -
 Rwandese
 -
 Korean
 -
 Kurdish
 -
 Kyrgyz
 -
 Lao
Lao -
 Latin
Latin -
 Latvian
 -
 Lithuanian
 -
 Luxembourgish
 -
 Macedonian
 -
 Malgashi
 -
 Malay
Malay -
 Malayalam
 -
 Maltese
 -
 Maori
Maori -
 Marathi
 -
 Mongolian
 -
 Myanmar
 -
 Nepali
 -
 Norwegian
 -
 Norwegian
 -
 Occitan
 -
 Pashto
 -
 Persian
 -
 Polish
 -
 Portuguese
 -
 Punjabi
 -
 Romanian
 -
 Russian
 -
 Samoan
 -
 Scottish Gaelic
 -
 Serbian
 -
 Sesotho
 -
 Shona
Shona -
 Sindhi
 -
 Sinhala
 -
 Slovak
 -
 Slovenian
 -
 Somali
 -
 Spanish
 -
 Sundanese
 -
 Swahili
 -
 Swedish
 -
 Tagalog
 -
 Tajik
Tajik -
 Tamil
Tamil -
 Tatar
Tatar -
 Telugu
 -
 Thai
Thai -
 Turkish
 -
 Turkmen
 -
 Ukrainian
 -
 Urdu
Urdu -
 Uighur
 -
 Uzbek
Uzbek -
 Vietnamese
 -
 Welsh
Welsh -
 Bantu
Bantu -
 Yiddish
 -
 Yoruba
 -
 Zulu
Zulu
How to Properly Attach a Gate to a T Post for Enhanced Stability and Durability
Attaching a Gate to a T-Post A Comprehensive Guide
Building a fence is a common project for homeowners and property owners aiming to enhance security, define property boundaries, or keep livestock contained. Regardless of the purpose, attaching a gate to a T-post is a significant task that can seem complicated without the right knowledge and tools. This article will provide a detailed guide on how to effectively attach a gate to a T-post, ensuring functionality and longevity.
Understanding T-Posts
T-posts, made of steel, are a popular choice for fencing due to their durability and resistance to the elements. They come in various sizes and are often used in conjunction with barbed wire or welded wire mesh. Unlike wooden posts, T-posts offer a sleek look and require minimal maintenance. However, their installation and the process of attaching gates demand careful consideration to ensure stability.
Tools and Materials Needed
Before you start, ensure you have the following tools and materials ready
1. T-posts – Choose the right size based on the height of your gate. 2. Gate – This can be a pre-manufactured gate or a custom-built option. 3. Gate hinges – Heavy-duty hinges are recommended for reliability. 4. Latch – A secure latch mechanism is crucial to ensure that the gate remains closed. 5. Power drill – For creating holes if necessary. 6. Wrench or sockets – For tightening nuts and bolts. 7. Level – To ensure your gate hangs evenly. 8. Tape measure – For accurate measurements.
Steps to Attach a Gate to a T-Post
1. Choose the Right Location Identify where you want to place the gate. Ensure it’s a convenient entry point and consider the terrain, as a level surface will aid in proper gate operation.
2. Install the T-Posts Start by driving the T-posts into the ground. A T-post driver is ideal for this task, providing the necessary force to embed the posts firmly. Typically, you should place two T-posts to create a stable frame for your gate.
attaching gate to t post
3. Measure and Cut Measure the width of your gate, ensuring it matches the distance between the two T-posts. If the T-posts are too far apart, you may have to add a third post in the middle for extra support.
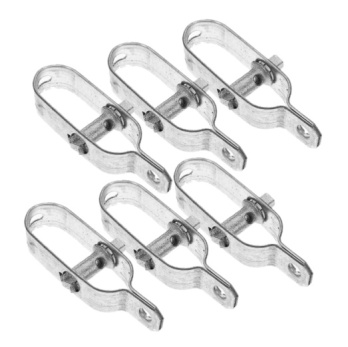
4. Attach the Hinges Position the hinges on the side of the gate that will attach to the T-post. Using a power drill, secure the hinges to the T-post with bolts. Ensure that they are tight and level, which will help the gate swing smoothly.
5. Hang the Gate With the hinges in place, lift the gate and attach it to the hinges mounted on the T-posts. It might be helpful to have an assistant for this step.
6. Install the Latch Attach the latch mechanism to the side of the gate that will face away from the T-posts. Ensure that it aligns correctly with the corresponding piece on the T-post to allow for ease of operation.
7. Test the Gate Once everything is secure, test the gate to ensure it opens and closes smoothly. Adjust the hinges as necessary to achieve a perfect fit.
Maintenance Tips
To prolong the life of your gate and the T-posts, regular maintenance is essential. Check for rust on metal components and address any wear and tear immediately. Lubricating the hinges can also prevent squeaking and ensure smooth operation.
Conclusion
Attaching a gate to a T-post is an achievable DIY project with the right tools and some careful planning. By following these steps, you can create a secure and functional entryway to your property, enhancing both its usability and aesthetic appeal. With a little effort, your gate can serve you well for years to come.