-
Email:zhao@hyliec.cn
-
Tel:+86 311 85273988
-
WhatsAPP:8613931128750
-
 Afrikaans
 -
 Albanian
 -
 Amharic
 -
 Arabic
 -
 Armenian
 -
 Azerbaijani
 -
 Basque
 -
 Belarusian
 -
 Bengali
 -
 Bosnian
 -
 Bulgarian
 -
 Catalan
 -
 Cebuano
 -
 Corsican
 -
 Croatian
 -
 Czech
Czech -
 Danish
 -
 Dutch
Dutch -
 English
 -
 Esperanto
 -
 Estonian
 -
 Finnish
 -
 French
 -
 Frisian
 -
 Galician
 -
 Georgian
 -
 German
 -
 Greek
Greek -
 Gujarati
 -
 Haitian Creole
 -
 hausa
hausa -
 hawaiian
 -
 Hebrew
 -
 Hindi
Hindi -
 Miao
Miao -
 Hungarian
 -
 Icelandic
 -
 igbo
igbo -
 Indonesian
 -
 irish
irish -
 Italian
 -
 Japanese
 -
 Javanese
 -
 Kannada
 -
 kazakh
 -
 Khmer
Khmer -
 Rwandese
 -
 Korean
 -
 Kurdish
 -
 Kyrgyz
 -
 Lao
Lao -
 Latin
Latin -
 Latvian
 -
 Lithuanian
 -
 Luxembourgish
 -
 Macedonian
 -
 Malgashi
 -
 Malay
Malay -
 Malayalam
 -
 Maltese
 -
 Maori
Maori -
 Marathi
 -
 Mongolian
 -
 Myanmar
 -
 Nepali
 -
 Norwegian
 -
 Norwegian
 -
 Occitan
 -
 Pashto
 -
 Persian
 -
 Polish
 -
 Portuguese
 -
 Punjabi
 -
 Romanian
 -
 Russian
 -
 Samoan
 -
 Scottish Gaelic
 -
 Serbian
 -
 Sesotho
 -
 Shona
Shona -
 Sindhi
 -
 Sinhala
 -
 Slovak
 -
 Slovenian
 -
 Somali
 -
 Spanish
 -
 Sundanese
 -
 Swahili
 -
 Swedish
 -
 Tagalog
 -
 Tajik
Tajik -
 Tamil
Tamil -
 Tatar
Tatar -
 Telugu
 -
 Thai
Thai -
 Turkish
 -
 Turkmen
 -
 Ukrainian
 -
 Urdu
Urdu -
 Uighur
 -
 Uzbek
Uzbek -
 Vietnamese
 -
 Welsh
Welsh -
 Bantu
Bantu -
 Yiddish
 -
 Yoruba
 -
 Zulu
Zulu
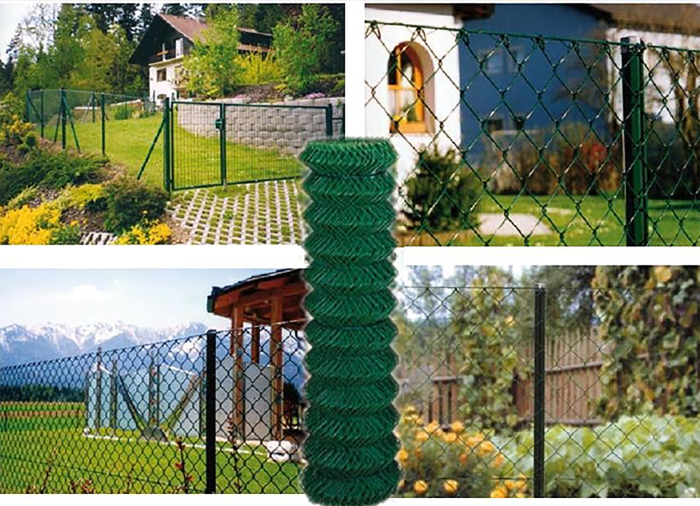
installing chicken wire around garden
Installing Chicken Wire Around Your Garden A Step-by-Step Guide
When it comes to protecting your garden from unwanted pests, installing chicken wire can be a practical and effective solution. Whether you’re dealing with rabbits, deer, or even roving pets, a sturdy fence made of chicken wire can provide a physical barrier that helps keep your plants safe. In this article, we’ll take you through the steps to successfully install chicken wire around your garden.
Step 1 Planning Your Garden Layout
Before you start buying materials, it’s important to plan the layout of your garden and determine the areas where you want to install the chicken wire. Consider the size of your garden and the types of plants you’re growing. Make a rough sketch to visualize the setup. Knowing where you’ll need gates or entrances is also crucial to ensure you can easily access your plants.
Step 2 Gather Materials
Once you have a solid plan, it’s time to gather your materials. You’ll need
- Chicken wire (available in various heights) - Wooden posts or metal stakes for support - A hammer or screwdriver (depending on your choice of posts) - Wire cutters - Garden gloves for protection - A measuring tape
Step 3 Mark Your Perimeter
Using your measuring tape, mark the perimeter of your garden where you plan to install the chicken wire. You can use stakes or small flags to outline the area. This will give you a clear view of how much chicken wire you’ll need and help you visualize the final product.
Step 4 Install the Posts
installing chicken wire around garden

Begin by installing the support posts at regular intervals around the perimeter of your garden. If you’re using wooden posts, drive them into the ground about one-third of their length to ensure stability. Posts should be placed every 4 to 6 feet for adequate support. If you’re using metal stakes, use a mallet to drive them firmly into the ground.
Step 5 Cut and Attach the Chicken Wire
Once your posts are securely in place, roll out the chicken wire along the perimeter of the garden. Use wire cutters to cut the length needed. Make sure the wire is tall enough to deter pests—typically, a height of about 3 to 4 feet is recommended. Start attaching the chicken wire to the posts using staples or wire ties. Ensure that the bottom of the wire is close to the ground to prevent small animals from burrowing under it.
Step 6 Create a Gate
If you need access to your garden, consider creating a gate. You can cut a section of chicken wire and attach it to one of the posts using hinges. This will allow you to swing the gate open for easy access while keeping pests out.
Step 7 Final Checks and Maintenance
Once your chicken wire is installed, perform a final check to ensure that there are no gaps or loose sections. Walk around the perimeter and ensure that everything is secure. Regular maintenance is key—watch for signs of wear and tear, and make necessary repairs promptly to keep your garden well-protected.
Conclusion
Installing chicken wire around your garden is a straightforward project that can provide significant benefits. Not only does it protect your plants from pests, but it also adds a tidy, organized look to your outdoor space. With a little time and effort, you can enjoy a thriving garden free from the stress of unwanted intruders. Happy gardening!
-
Secure Your Space with Double Wire Mesh Fences
NewsJun.20,2025
-
Modern and Stylish 3D Fencing Solutions
NewsJun.20,2025
-
Enhance Your Garden with Beautiful Border Fences
NewsJun.20,2025
-
Enhance Security with High-Quality Fencing Solutions
NewsJun.20,2025
-
Elevate Your Space with Elegant Fencing Solutions
NewsJun.20,2025
-
Durable and Secure Fencing Solutions
NewsJun.20,2025
