
-
Email:zhao@hyliec.cn
-
Tel:+86 311 85273988
-
WhatsAPP:8613931128750
-
 Afrikaans
 -
 Albanian
 -
 Amharic
 -
 Arabic
 -
 Armenian
 -
 Azerbaijani
 -
 Basque
 -
 Belarusian
 -
 Bengali
 -
 Bosnian
 -
 Bulgarian
 -
 Catalan
 -
 Cebuano
 -
 Corsican
 -
 Croatian
 -
 Czech
Czech -
 Danish
 -
 Dutch
Dutch -
 English
 -
 Esperanto
 -
 Estonian
 -
 Finnish
 -
 French
 -
 Frisian
 -
 Galician
 -
 Georgian
 -
 German
 -
 Greek
Greek -
 Gujarati
 -
 Haitian Creole
 -
 hausa
hausa -
 hawaiian
 -
 Hebrew
 -
 Hindi
Hindi -
 Miao
Miao -
 Hungarian
 -
 Icelandic
 -
 igbo
igbo -
 Indonesian
 -
 irish
irish -
 Italian
 -
 Japanese
 -
 Javanese
 -
 Kannada
 -
 kazakh
 -
 Khmer
Khmer -
 Rwandese
 -
 Korean
 -
 Kurdish
 -
 Kyrgyz
 -
 Lao
Lao -
 Latin
Latin -
 Latvian
 -
 Lithuanian
 -
 Luxembourgish
 -
 Macedonian
 -
 Malgashi
 -
 Malay
Malay -
 Malayalam
 -
 Maltese
 -
 Maori
Maori -
 Marathi
 -
 Mongolian
 -
 Myanmar
 -
 Nepali
 -
 Norwegian
 -
 Norwegian
 -
 Occitan
 -
 Pashto
 -
 Persian
 -
 Polish
 -
 Portuguese
 -
 Punjabi
 -
 Romanian
 -
 Russian
 -
 Samoan
 -
 Scottish Gaelic
 -
 Serbian
 -
 Sesotho
 -
 Shona
Shona -
 Sindhi
 -
 Sinhala
 -
 Slovak
 -
 Slovenian
 -
 Somali
 -
 Spanish
 -
 Sundanese
 -
 Swahili
 -
 Swedish
 -
 Tagalog
 -
 Tajik
Tajik -
 Tamil
Tamil -
 Tatar
Tatar -
 Telugu
 -
 Thai
Thai -
 Turkish
 -
 Turkmen
 -
 Ukrainian
 -
 Urdu
Urdu -
 Uighur
 -
 Uzbek
Uzbek -
 Vietnamese
 -
 Welsh
Welsh -
 Bantu
Bantu -
 Yiddish
 -
 Yoruba
 -
 Zulu
Zulu
making a chicken wire gate
Making a Chicken Wire Gate A Step-by-Step Guide
Creating a chicken wire gate is a practical project for anyone interested in maintaining a secure area for pets or gardening. This guide outlines the necessary materials, tools, and steps to help you construct a functional and aesthetically pleasing chicken wire gate.
Materials Needed
1. Chicken Wire The primary material for the gate. Choose a gauge that suits your needs; typically, 14-gauge wire is recommended for durability. 2. Wooden or Metal Frame You can use treated lumber or metal tubing depending on your preference. Common dimensions are 2x4 inches for wood or 1-inch square tubing for metal. 3. Hinges Heavy-duty hinges that can withstand weather conditions and frequent use. 4. Gate Latch A sturdy latch mechanism to keep the gate closed securely. 5. Staples or Wire Ties To attach the chicken wire to the frame securely. 6. Paint or Wood Sealant Optional, used for protection against weather and to enhance appearance.
Tools Required
1. Measuring Tape For accurate measurements. 2. Saw A circular saw is preferred for cutting wood; a hacksaw works well for metal. 3. Drill To create holes for hinges and to attach the latch. 4. Wire Cutters For trimming the chicken wire. 5. Pliers Useful for bending and twisting wire for secure connections. 6. Level To ensure the gate is straight and properly aligned.
Step-by-Step Instructions
Step 1 Measure and Cut the Frame
Begin by determining the width and height of your gate. A standard size is about 4 feet wide by 5 feet high, but adjust according to your needs. Using your measuring tape, mark the wood or metal accordingly. Then, cut the materials using a saw. Ensure that you have two vertical pieces for the sides and two horizontal pieces for the top and bottom.
Step 2 Assemble the Frame
Lay the cut pieces on a flat surface and assemble the frame. Attach the horizontal pieces to the vertical pieces to form a rectangle. Use screws or bolts for metal to secure the corners firmly. It’s essential to ensure that the frame is square (the corners are all 90 degrees) using a level or carpenter’s square.
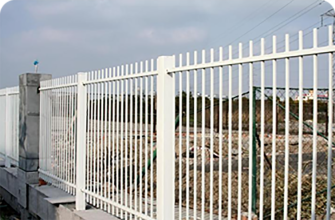
making a chicken wire gate
Step 3 Attach the Chicken Wire
Roll out the chicken wire and lay it over the frame. Cut the chicken wire to size, leaving an extra inch on all sides to fold over the edges of the frame. Using staples or wire ties, attach the chicken wire to the frame securely. Make sure there are no gaps, as this will help keep out unwanted pests.
Step 4 Install Hinges
Decide which side you want the gate to swing open. Attach the hinges to this side of the gate, ensuring they are positioned evenly and securely. Using a drill, create pilot holes to prevent the wood from splitting and then attach the hinges.
Step 5 Attach the Latch
On the opposite side from the hinges, install the gate latch. Ensure it’s positioned at a convenient height for ease of use. Again, drill pilot holes before attaching the latch with screws.
Step 6 Finish the Gate
If you’re using wooden materials, consider applying paint or sealant to protect your gate from the elements. This step enhances the appearance and longevity of your project.
Conclusion
Building a chicken wire gate is a straightforward yet rewarding project. With proper measurements and the right materials, you can create a sturdy gate that meets your needs. Whether for your garden, pets, or livestock, a well-constructed chicken wire gate ensures security and practicality. Happy building!
-
Well Casing Extension Couplings – Applications and Installation
NewsMay.19,2025
-
Stylish Garden Gates for Sale – Enhance Your Outdoor Space
NewsMay.19,2025
-
Fencing Wire Roll Maintenance – How to Make It Last Longer
NewsMay.19,2025
-
Different Types of Fence Posts for Various Fencing Needs
NewsMay.19,2025
-
Creative Ways to Use Panel Fencing in Your Garden
NewsMay.19,2025
-
Plant Supports Wholesale
NewsMay.13,2025