
-
Email:zhao@hyliec.cn
-
Tel:+86 311 85273988
-
WhatsAPP:8613931128750
-
 Afrikaans
 -
 Albanian
 -
 Amharic
 -
 Arabic
 -
 Armenian
 -
 Azerbaijani
 -
 Basque
 -
 Belarusian
 -
 Bengali
 -
 Bosnian
 -
 Bulgarian
 -
 Catalan
 -
 Cebuano
 -
 Corsican
 -
 Croatian
 -
 Czech
Czech -
 Danish
 -
 Dutch
Dutch -
 English
 -
 Esperanto
 -
 Estonian
 -
 Finnish
 -
 French
 -
 Frisian
 -
 Galician
 -
 Georgian
 -
 German
 -
 Greek
Greek -
 Gujarati
 -
 Haitian Creole
 -
 hausa
hausa -
 hawaiian
 -
 Hebrew
 -
 Hindi
Hindi -
 Miao
Miao -
 Hungarian
 -
 Icelandic
 -
 igbo
igbo -
 Indonesian
 -
 irish
irish -
 Italian
 -
 Japanese
 -
 Javanese
 -
 Kannada
 -
 kazakh
 -
 Khmer
Khmer -
 Rwandese
 -
 Korean
 -
 Kurdish
 -
 Kyrgyz
 -
 Lao
Lao -
 Latin
Latin -
 Latvian
 -
 Lithuanian
 -
 Luxembourgish
 -
 Macedonian
 -
 Malgashi
 -
 Malay
Malay -
 Malayalam
 -
 Maltese
 -
 Maori
Maori -
 Marathi
 -
 Mongolian
 -
 Myanmar
 -
 Nepali
 -
 Norwegian
 -
 Norwegian
 -
 Occitan
 -
 Pashto
 -
 Persian
 -
 Polish
 -
 Portuguese
 -
 Punjabi
 -
 Romanian
 -
 Russian
 -
 Samoan
 -
 Scottish Gaelic
 -
 Serbian
 -
 Sesotho
 -
 Shona
Shona -
 Sindhi
 -
 Sinhala
 -
 Slovak
 -
 Slovenian
 -
 Somali
 -
 Spanish
 -
 Sundanese
 -
 Swahili
 -
 Swedish
 -
 Tagalog
 -
 Tajik
Tajik -
 Tamil
Tamil -
 Tatar
Tatar -
 Telugu
 -
 Thai
Thai -
 Turkish
 -
 Turkmen
 -
 Ukrainian
 -
 Urdu
Urdu -
 Uighur
 -
 Uzbek
Uzbek -
 Vietnamese
 -
 Welsh
Welsh -
 Bantu
Bantu -
 Yiddish
 -
 Yoruba
 -
 Zulu
Zulu
Steps to Install Chicken Wire on T Posts for Effective Fencing Solutions
Installing Chicken Wire on T Posts A Step-by-Step Guide
When it comes to securing your garden or livestock area, chicken wire is a popular and effective choice. Its strength and versatility make it ideal for keeping out unwanted pests while allowing your plants and animals to thrive. In this article, we will discuss how to properly install chicken wire on T posts, ensuring a sturdy and reliable enclosure that will last for years.
Materials Needed
Before you get started, you'll need to gather some materials
1. Chicken Wire Select the appropriate gauge and size for your needs. 2. T Posts These metal posts are strong and lightweight, making them perfect for supporting your chicken wire. 3. Post Driver or Hammer For driving the T posts into the ground. 4. Wire Cutters To cut the chicken wire to the required length. 5. Staple Gun and Staples To secure the wire to the posts. 6. Gloves To protect your hands while handling wire. 7. Measuring Tape To measure distances accurately.
Step 1 Planning Your Enclosure
Start by sketching out your planned area. Determine the dimensions of your enclosure, keeping in mind the space requirements for your plants or animals. This will help you calculate how many T posts and how much chicken wire you’ll need.
Step 2 Setting the T Posts
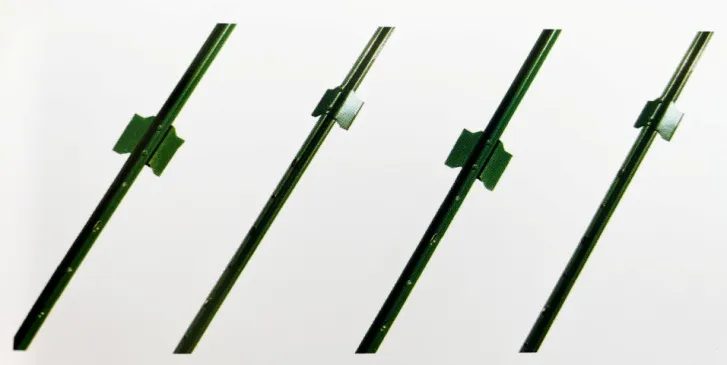
Once you have your materials ready, begin by determining where to place your T posts. Generally, posts should be placed 6 to 10 feet apart, depending on the height of the chicken wire and the terrain. Use a post driver or hammer to drive each T post into the ground until about 2 to 3 inches remain above the ground. Make sure the posts are straight and firmly anchored.
installing chicken wire on t posts
Step 3 Cutting the Chicken Wire
Unroll the chicken wire along the ground and measure the length you need to cover the distance between your T posts. Use wire cutters to cut the wire to the required length. Be cautious while cutting, as the edges of the wire can be sharp.
Step 4 Attaching the Chicken Wire
Begin attaching the chicken wire to the T posts. Starting from one end, stretch the wire tightly to avoid sagging, and use a staple gun to secure the top of the wire to the post. Ensure that the wire is taut by pulling it firmly before stapling. Repeat this process for the other posts, working your way around the enclosure.
For additional security, you can also staple the bottom of the wire to the posts. If you plan on keeping larger animals, consider burying a portion of the chicken wire underground to prevent them from pushing beneath the fence.
Step 5 Finishing Touches
After securing the chicken wire, trim off any excess wire using wire cutters. Inspect your work to ensure that all sections are tightly affixed and that there are no gaps where animals can enter or escape. If needed, you can use extra wooden stakes or additional wire to reinforce any weak points.
Conclusion
Installing chicken wire on T posts is a straightforward DIY project that can greatly enhance the security of your garden or livestock area. With the right materials and a little bit of effort, you can create a safe and effective enclosure that will keep your plants and animals protected from unwanted visitors. Remember to regularly inspect your installation to ensure it remains in good condition, and enjoy the peace of mind that comes with a secure environment. Happy gardening!