-
Email:zhao@hyliec.cn
-
Tel:+86 311 85273988
-
WhatsAPP:8613931128750
-
 Afrikaans
 -
 Albanian
 -
 Amharic
 -
 Arabic
 -
 Armenian
 -
 Azerbaijani
 -
 Basque
 -
 Belarusian
 -
 Bengali
 -
 Bosnian
 -
 Bulgarian
 -
 Catalan
 -
 Cebuano
 -
 Corsican
 -
 Croatian
 -
 Czech
Czech -
 Danish
 -
 Dutch
Dutch -
 English
 -
 Esperanto
 -
 Estonian
 -
 Finnish
 -
 French
 -
 Frisian
 -
 Galician
 -
 Georgian
 -
 German
 -
 Greek
Greek -
 Gujarati
 -
 Haitian Creole
 -
 hausa
hausa -
 hawaiian
 -
 Hebrew
 -
 Hindi
Hindi -
 Miao
Miao -
 Hungarian
 -
 Icelandic
 -
 igbo
igbo -
 Indonesian
 -
 irish
irish -
 Italian
 -
 Japanese
 -
 Javanese
 -
 Kannada
 -
 kazakh
 -
 Khmer
Khmer -
 Rwandese
 -
 Korean
 -
 Kurdish
 -
 Kyrgyz
 -
 Lao
Lao -
 Latin
Latin -
 Latvian
 -
 Lithuanian
 -
 Luxembourgish
 -
 Macedonian
 -
 Malgashi
 -
 Malay
Malay -
 Malayalam
 -
 Maltese
 -
 Maori
Maori -
 Marathi
 -
 Mongolian
 -
 Myanmar
 -
 Nepali
 -
 Norwegian
 -
 Norwegian
 -
 Occitan
 -
 Pashto
 -
 Persian
 -
 Polish
 -
 Portuguese
 -
 Punjabi
 -
 Romanian
 -
 Russian
 -
 Samoan
 -
 Scottish Gaelic
 -
 Serbian
 -
 Sesotho
 -
 Shona
Shona -
 Sindhi
 -
 Sinhala
 -
 Slovak
 -
 Slovenian
 -
 Somali
 -
 Spanish
 -
 Sundanese
 -
 Swahili
 -
 Swedish
 -
 Tagalog
 -
 Tajik
Tajik -
 Tamil
Tamil -
 Tatar
Tatar -
 Telugu
 -
 Thai
Thai -
 Turkish
 -
 Turkmen
 -
 Ukrainian
 -
 Urdu
Urdu -
 Uighur
 -
 Uzbek
Uzbek -
 Vietnamese
 -
 Welsh
Welsh -
 Bantu
Bantu -
 Yiddish
 -
 Yoruba
 -
 Zulu
Zulu
Installing a Chicken Wire Fence for Backyard Poultry Protection and Easy Containment Solutions
Putting Up a Chicken Wire Fence A Step-by-Step Guide
Creating a safe and secure environment for your chickens is crucial for their health and productivity. One of the most effective ways to protect your feathered friends is by erecting a chicken wire fence. This type of fencing is not only economical but also easy to install. In this article, we will guide you through the steps to successfully put up a chicken wire fence.
Step 1 Planning Your Fence
Before diving into the installation process, it’s essential to plan out your chicken wire fence. Determine the area you want to enclose and consider the number of chickens you have. A general rule of thumb is to provide about 10 square feet of space per bird. This will help keep your chickens comfortable and reduce stress.
Next, consider the layout. It can be a simple rectangular shape or a more complex design. Make sure to mark the corners of the fence with stakes, and use string to outline the perimeter to ensure that the fence will be straight once installed.
Step 2 Gathering Materials
The next step is to gather the necessary materials for your project. For a basic chicken wire fence, you will need
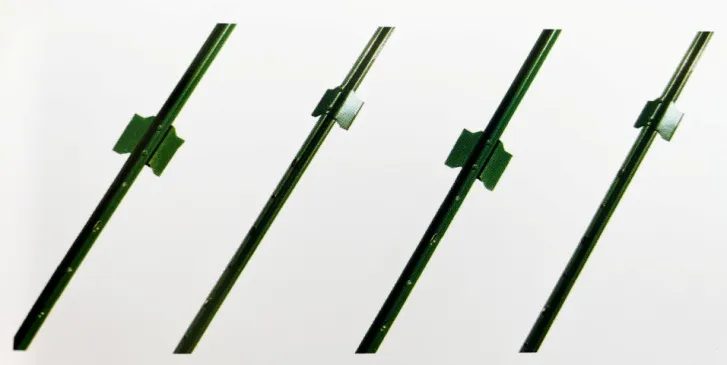
- Chicken wire (available in various heights and sizes) - Fence posts (wood or metal, about 4-6 feet tall) - A post driver or a sledgehammer - Wire cutters and gloves - Staples or U-nails for securing the wire to the posts - Optional gate hardware if you plan to install a gate
Step 3 Installing the Fence Posts
Once you have your materials ready, it’s time to install the fence posts. Start by placing the posts at the corners of your fenced area. Then, space additional posts every 6-10 feet along the perimeter. To do this, use a post driver or a sledgehammer to drive the posts into the ground to a depth of at least 2 feet. Ensure that the posts are straight and level.
putting up a chicken wire fence

For added stability, you may want to anchor the posts with concrete, especially in areas with loose soil
.Step 4 Attaching the Chicken Wire
With the posts securely in place, you can now attach the chicken wire. Unroll the chicken wire along the perimeter of the fence and cut it to the desired height. Starting at one corner, use staples or U-nails to secure the wire to the top of each post. Make sure to pull the wire taut as you go to prevent sagging.
Remember to also bury the bottom edge of the wire at least 6 inches below the ground to deter any digging animals. If you prefer, you can create a dig guard by bending the bottom of the wire outward before burying it, forming an “L” shape that extends away from the fenced area.
Step 5 Finishing Touches
Once the chicken wire is secured to the posts, cut any excess wire at the top and bottom. If you need a gate, you can install a simple wooden or metal gate using gate hinges attached to the posts. Ensure that the gate swings freely and can be secured when closed.
Finally, walk around the perimeter of the fence to check for any sharp edges or protrusions that could harm your chickens. Smooth out any rough areas and ensure the entire fence is secure.
Conclusion
Erecting a chicken wire fence is an excellent investment for any chicken keeper. By following these steps, you can create a safe and secure environment that will protect your birds from predators, providing peace of mind as they roam freely. Happy chicken keeping!
-
garden-fence-on-a-roll-versatile-solutions-for-outdoor-enclosure-and-decoration
NewsAug.22,2025
-
fence-post-varieties-essential-components-for-durable-enclosures
NewsAug.22,2025
-
garden-fence-panels-blending-functionality-and-aesthetic-appeal
NewsAug.22,2025
-
tools-for-fence-essential-equipment-for-garden-fence-installation-and-maintenance
NewsAug.22,2025
-
fence-and-gate-accessories-enhancing-functionality-and-durability
NewsAug.22,2025
-
metal-plant-supports-essential-structures-for-healthy-plant-growth
NewsAug.22,2025
