-
Email:zhao@hyliec.cn
-
Tel:+86 311 85273988
-
WhatsAPP:8613931128750
-
 Afrikaans
 -
 Albanian
 -
 Amharic
 -
 Arabic
 -
 Armenian
 -
 Azerbaijani
 -
 Basque
 -
 Belarusian
 -
 Bengali
 -
 Bosnian
 -
 Bulgarian
 -
 Catalan
 -
 Cebuano
 -
 Corsican
 -
 Croatian
 -
 Czech
Czech -
 Danish
 -
 Dutch
Dutch -
 English
 -
 Esperanto
 -
 Estonian
 -
 Finnish
 -
 French
 -
 Frisian
 -
 Galician
 -
 Georgian
 -
 German
 -
 Greek
Greek -
 Gujarati
 -
 Haitian Creole
 -
 hausa
hausa -
 hawaiian
 -
 Hebrew
 -
 Hindi
Hindi -
 Miao
Miao -
 Hungarian
 -
 Icelandic
 -
 igbo
igbo -
 Indonesian
 -
 irish
irish -
 Italian
 -
 Japanese
 -
 Javanese
 -
 Kannada
 -
 kazakh
 -
 Khmer
Khmer -
 Rwandese
 -
 Korean
 -
 Kurdish
 -
 Kyrgyz
 -
 Lao
Lao -
 Latin
Latin -
 Latvian
 -
 Lithuanian
 -
 Luxembourgish
 -
 Macedonian
 -
 Malgashi
 -
 Malay
Malay -
 Malayalam
 -
 Maltese
 -
 Maori
Maori -
 Marathi
 -
 Mongolian
 -
 Myanmar
 -
 Nepali
 -
 Norwegian
 -
 Norwegian
 -
 Occitan
 -
 Pashto
 -
 Persian
 -
 Polish
 -
 Portuguese
 -
 Punjabi
 -
 Romanian
 -
 Russian
 -
 Samoan
 -
 Scottish Gaelic
 -
 Serbian
 -
 Sesotho
 -
 Shona
Shona -
 Sindhi
 -
 Sinhala
 -
 Slovak
 -
 Slovenian
 -
 Somali
 -
 Spanish
 -
 Sundanese
 -
 Swahili
 -
 Swedish
 -
 Tagalog
 -
 Tajik
Tajik -
 Tamil
Tamil -
 Tatar
Tatar -
 Telugu
 -
 Thai
Thai -
 Turkish
 -
 Turkmen
 -
 Ukrainian
 -
 Urdu
Urdu -
 Uighur
 -
 Uzbek
Uzbek -
 Vietnamese
 -
 Welsh
Welsh -
 Bantu
Bantu -
 Yiddish
 -
 Yoruba
 -
 Zulu
Zulu
Creating a Fenced Area with 100x75 Feet Using 20 Fence Posts
The Essential Guide to Installing a 100x75 Fence Post
When planning to build a fence, one of the most critical components is the fence post. With a standard size of 100x75mm, these posts are robust and provide the necessary support for any fencing material. Understanding how to properly install these posts can make all the difference in the longevity and durability of your fence.
Choosing the Right Material
Before you start the installation process, it’s essential to select the right material for your fence posts. Wood, metal, and vinyl are common choices. For wooden posts, pressure-treated lumber can enhance durability, especially against weather conditions. On the other hand, metal posts offer a more contemporary look and are virtually indestructible. Meanwhile, vinyl posts are low maintenance and resist weathering, making them a popular choice for many homeowners.
Tools You Will Need
To install a 100x75mm fence post, having the right tools at your disposal is vital. Here’s a short list of items you’ll likely need - A post hole digger or auger - A level - Concrete mix - A hammer - Safety gear (gloves and goggles)
Steps for Installation
1. Plan Your Layout Before digging, determine where you want your fence posts. Measure out the spacing between posts—typically, this distance ranges from 6 to 8 feet, depending on your design.
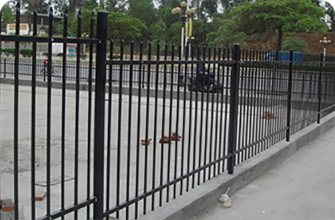
100x75 fence post

2. Dig the Holes Using your post hole digger or auger, create holes that are at least one-third the height of the fence post. For a standard 8-foot post, the hole should be around 2-3 feet deep.
3. Insert the Posts Place the 100x75mm post into the hole. Ensure it’s vertical by using a level. It’s crucial to adjust the post while the concrete hasn’t set yet, as this is the best time to achieve perfect alignment.
4. Concrete Mixing Mix your concrete according to the manufacturer's instructions and pour it around the post. Ensure the concrete is about 2-3 inches above ground level to prevent water from pooling around the post.
5. Allow to Cure Let the concrete cure for at least 24-48 hours. During this time, avoid putting any pressure on the posts to ensure they set firmly.
6. Finish Up Once the concrete has cured, you can proceed with attaching the fence panels to your posts. Use appropriate brackets or screws, depending on the fence material you’ve chosen.
Conclusion
Installing a 100x75mm fence post requires careful planning and execution. By selecting the right materials and following the proper steps, you can create a solid foundation for your fence that will withstand the elements and stand the test of time. Whether you are looking for privacy, security, or aesthetic appeal, a well-constructed fence will enhance your property’s value and curb appeal significantly. Happy fencing!
-
Secure Your Space with Double Wire Mesh Fences
NewsJun.20,2025
-
Modern and Stylish 3D Fencing Solutions
NewsJun.20,2025
-
Enhance Your Garden with Beautiful Border Fences
NewsJun.20,2025
-
Enhance Security with High-Quality Fencing Solutions
NewsJun.20,2025
-
Elevate Your Space with Elegant Fencing Solutions
NewsJun.20,2025
-
Durable and Secure Fencing Solutions
NewsJun.20,2025
