-
Email:zhao@hyliec.cn
-
Tel:+86 311 85273988
-
WhatsAPP:8613931128750
-
 Afrikaans
 -
 Albanian
 -
 Amharic
 -
 Arabic
 -
 Armenian
 -
 Azerbaijani
 -
 Basque
 -
 Belarusian
 -
 Bengali
 -
 Bosnian
 -
 Bulgarian
 -
 Catalan
 -
 Cebuano
 -
 Corsican
 -
 Croatian
 -
 Czech
Czech -
 Danish
 -
 Dutch
Dutch -
 English
 -
 Esperanto
 -
 Estonian
 -
 Finnish
 -
 French
 -
 Frisian
 -
 Galician
 -
 Georgian
 -
 German
 -
 Greek
Greek -
 Gujarati
 -
 Haitian Creole
 -
 hausa
hausa -
 hawaiian
 -
 Hebrew
 -
 Hindi
Hindi -
 Miao
Miao -
 Hungarian
 -
 Icelandic
 -
 igbo
igbo -
 Indonesian
 -
 irish
irish -
 Italian
 -
 Japanese
 -
 Javanese
 -
 Kannada
 -
 kazakh
 -
 Khmer
Khmer -
 Rwandese
 -
 Korean
 -
 Kurdish
 -
 Kyrgyz
 -
 Lao
Lao -
 Latin
Latin -
 Latvian
 -
 Lithuanian
 -
 Luxembourgish
 -
 Macedonian
 -
 Malgashi
 -
 Malay
Malay -
 Malayalam
 -
 Maltese
 -
 Maori
Maori -
 Marathi
 -
 Mongolian
 -
 Myanmar
 -
 Nepali
 -
 Norwegian
 -
 Norwegian
 -
 Occitan
 -
 Pashto
 -
 Persian
 -
 Polish
 -
 Portuguese
 -
 Punjabi
 -
 Romanian
 -
 Russian
 -
 Samoan
 -
 Scottish Gaelic
 -
 Serbian
 -
 Sesotho
 -
 Shona
Shona -
 Sindhi
 -
 Sinhala
 -
 Slovak
 -
 Slovenian
 -
 Somali
 -
 Spanish
 -
 Sundanese
 -
 Swahili
 -
 Swedish
 -
 Tagalog
 -
 Tajik
Tajik -
 Tamil
Tamil -
 Tatar
Tatar -
 Telugu
 -
 Thai
Thai -
 Turkish
 -
 Turkmen
 -
 Ukrainian
 -
 Urdu
Urdu -
 Uighur
 -
 Uzbek
Uzbek -
 Vietnamese
 -
 Welsh
Welsh -
 Bantu
Bantu -
 Yiddish
 -
 Yoruba
 -
 Zulu
Zulu
making a gate with t posts
How to Make a Gate with T-Posts
Creating a functional and attractive gate using T-posts is a great DIY project for anyone looking to enhance their property’s exterior. T-posts are sturdy, durable, and cost-effective, making them an excellent choice for supporting gates in various settings, from agricultural fencing to residential gardens. Here’s a comprehensive guide on how to make your own gate with T-posts.
Materials Needed
1. T-posts (quantity depends on the size of your gate) 2. Wooden gate frame or gate panel 3. Gate hinges (preferably heavy-duty) 4. Latch mechanism 5. Wire or fencing material (if necessary) 6. Concrete (optional, for securing posts) 7. Tools post driver or hammer, level, measuring tape, drill, and saw
Step 1 Planning Your Gate
Before you start, determine the location and size of your gate. Consider both aesthetics and function—your gate should complement your property while providing easy access. Mark the desired width and height with stakes and string to visualize the project area.
Step 2 Install T-Posts
Using a post driver or hammer, install your T-posts at the designated corners of your gate. Ensure the posts are evenly spaced according to your planned gate size. For added stability, you can pour concrete around the base of each T-post. The posts should be vertically aligned, so use a level to check their positioning.
Step 3 Build the Gate Frame
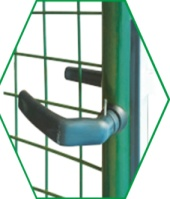
making a gate with t posts

Construct a gate frame using treated lumber. Cut the wood to the desired dimensions typically, a height of 4 to 6 feet is standard for residential gates. Assemble the frame using wood screws or nails, ensuring that each corner is reinforced for strength. You may also choose to attach fencing material, such as wire or wooden slats, to the frame for added privacy and security.
Step 4 Attach Hinges
Securely attach heavy-duty hinges to one side of the gate frame. Then, attach the corresponding hinges to the T-post on that side. Make sure the gate swings freely and is aligned properly with the entrance.
Step 5 Install the Latch
On the opposite side of where the hinges are attached, install a latch mechanism. This can be a simple hook latch or a more sophisticated locking system, depending on your security needs. The latch should be easy to operate from both sides of the gate.
Step 6 Final Adjustments
Once everything is in place, open and close the gate a few times to ensure it operates smoothly. Make any necessary adjustments to the hinges or latch for a better fit. You can also paint or stain the gate frame to match your home’s exterior.
Conclusion
Building a gate with T-posts is a rewarding project that adds charm and function to your property. With careful planning and execution, you can create a beautiful entryway that complements your landscape and meets your practical needs. Enjoy your new gate!
-
Secure Your Space with Double Wire Mesh Fences
NewsJun.20,2025
-
Modern and Stylish 3D Fencing Solutions
NewsJun.20,2025
-
Enhance Your Garden with Beautiful Border Fences
NewsJun.20,2025
-
Enhance Security with High-Quality Fencing Solutions
NewsJun.20,2025
-
Elevate Your Space with Elegant Fencing Solutions
NewsJun.20,2025
-
Durable and Secure Fencing Solutions
NewsJun.20,2025
